diigo
Ways To Use Diigo's "Blog This":
"Blog This" for a particular body of text
When you found something interesting while reading a webpage, you can spontaneously highlight a block of content and click "Blog This" button from the toolbar or the right-click menu:
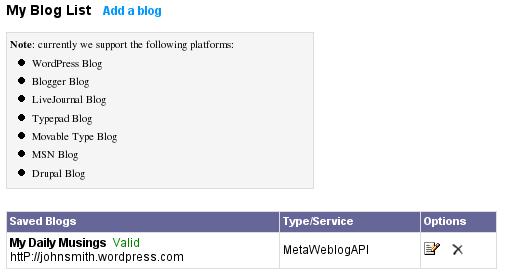
Since this page has not been bookmarked yet, only your highlighted content (text, picture, or table of data), the page's title (link to original page) get automatically posted to an editing window, all nicely formatted, and ready for you to edit. On the left panel, choose which of your blogs (multiple allowed) and category to post to. You can post as draft or directly publish to your blog.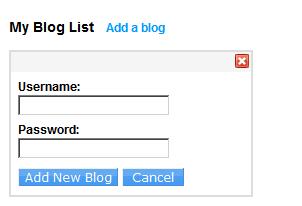
"Blog This" for an annotated page
Once you have annotated a webpage with highlights and sticky notes, you can make a blog post based on this annotated page by simply click "Blog This" button.
Because you have bookmarked this page, all your highlights and notes, along with Diigo members' public notes on that webpage will get automatically posted to an editing window, all nicely formatted and ready for you to edit. You will have an additional choice to edit based on "My Diigo Contents" only, or "Include All".
"Blog This" based on contents on a subject
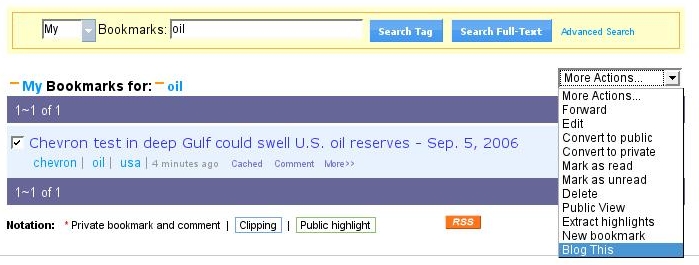
Frequently after doing research on something, you have found relevant information on multiple pages. You can now easily "Blog This" based on contents on a subject by going to "My Bookmarks" section, checking off desired bookmarks, and selecting "Blog This" from the "More Actions" pull-down menu: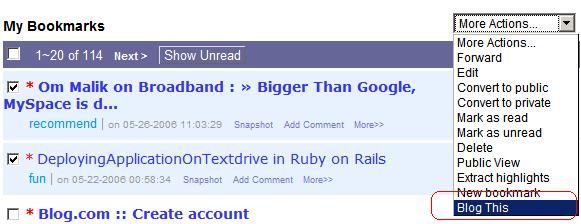
All information you entered and extracted will automatically be pre-populated in a new blog post editing window. This makes it very efficient for you to compose a new article based on various online content you've already researched!
posted by mg @ 1:02 AM
![]()
![]()

0 Comments:
Post a Comment
<< Home